amp対応方法
amp(Accelerated Mobile Pages) とはモバイル端末で対象ページをより早く表示するために、google側でページの情報をキャッシュするという仕組みです。
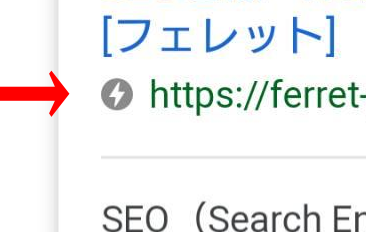
ampの導入にはwebページ側で対処が必要で、amp用のページを用意するとgoogle側で検知をし、検索結果画面( SERP ) でampページのマークが付与されます。

このマークが付いたページは、高速に表示されるようなつくりになっています。
amp対応作業
通常ページを
https://example.com/index.html
AMPページを
https://example.com/amp.html
としましょう
まず、元の通常ページに対して
<link rel="amphtml" href="https://example.com/amp.html">をheadタグ内に記載します。
ampページがありますよという宣言です。
ampページを作成
まずAMPページに対して
<link rel="canonical" href="https://example.com/index.html" />をheadタグ内に記載します。
元のページの宣言です。
尚、ampページにはいくつかの制約があります。
- 特定のjavascriptしか使えない
- CSSは特殊タグで囲み、ページ内で読み込む
- viewportを必ず設定する
- amp用の解析タグ、広告タグが必要
- imgタグを特殊タグに変更
- amp用のgoogle広告タグに変更
等があります。
amp用の例
まずはドキュメントのマークアップを
<!DOCTYPE html>
<html AMP lang="ja">
にします。
両方とも必須です。
次にviewportです。
head内に
<meta name="viewport" content="width=device-width,minimum-scale=1">とします。
次にhead内に
<script async src="https://cdn.ampproject.org/v0.js"></script>と記述します。
これは、拡張機能によるレンダリング ブロックを回避するためです。
次にhead内に
<script async custom-element="amp-carousel" src="https://cdn.ampproject.org/v0/amp-carousel-0.1.js"></script>
<style amp-boilerplate>body{-webkit-animation:-amp-start 8s steps(1,end) 0s 1 normal both;-moz-animation:-amp-start 8s steps(1,end) 0s 1 normal both;-ms-animation:-amp-start 8s steps(1,end) 0s 1 normal both;animation:-amp-start 8s steps(1,end) 0s 1 normal both}@-webkit-keyframes -amp-start{from{visibility:hidden}to{visibility:visible}}@-moz-keyframes -amp-start{from{visibility:hidden}to{visibility:visible}}@-ms-keyframes -amp-start{from{visibility:hidden}to{visibility:visible}}@-o-keyframes -amp-start{from{visibility:hidden}to{visibility:visible}}@keyframes -amp-start{from{visibility:hidden}to{visibility:visible}}</style><noscript><style amp-boilerplate>body{-webkit-animation:none;-moz-animation:none;-ms-animation:none;animation:none}</style></noscript>
を記述します。
これは、 amp用のカルーセルを使うためです。
cssの記述は
<style amp-custom>
 …
</style>
で囲います。
画像タグは
<amp-img src="xxx" alt="xxx" height="xx" width="x"></amp-img>というようにタグを変更し、大きさを指定します。
これで、amp用のページは準備完了です。
最後に
https://search.google.com/test/amp?hl=ja
でampテスト行いましょう。
google広告
googleの広告タグもamp専用のものに変えます。
下記は自動広告の例です。
head内に
<script async custom-element="amp-auto-ads"
        src="https://cdn.ampproject.org/v0/amp-auto-ads-0.1.js">
</script>
を記述します。
body内に
<amp-auto-ads type="adsense"
	data-ad-client="ca-pub-xxxxxxxxxxxxx(広告クライアントID)">
</amp-auto-ads>
を記述します。
google analytics
googleのアクセス情報を収集するためにanalyticsを使っている場合は、修正します。
<amp-analytics type="googleanalytics" id="analytics1">
<script type="application/json">
{
  "vars": {
    "account": "アカウントID"
  },
  "triggers": {
    "trackPageview": {
      "on": "visible",
      "request": "pageview"
    }
  }
}
</script>
</amp-analytics>
以上が最低限の記述です。
ampにすると特殊タグや拡張機能によって様々な修正を余儀なくしなければならないケースが多くあります。
ユーザーの使いやすさを考えてampを作成する事が大切だと思います。

